
Here is the story of why we needed a Hand Sanitizer Cozy 🙂
While hiking in the beautiful woods behind our home a few weeks ago, we found a bazillion toads! Yes, of course I’ve always known the woods was chock full of toads but on this trip all the kids were intent on catching every. single. one. yay.

We spent about 4 hours hiking this particular day and went through a rather large amount of hand sanitizer. Also, I’m pretty sure we traumatized the entire toad population for the day 🙂
We visited the spoon tree, a local legend. Maybe legend isn’t the right word here… but those who know it have a story about it I’m sure!

See the little spoon sticking out of the tree? Yup. Exciting stuff.. haha
Since the local quarry seems intent on blasting apart the entire mountain we traveled all over the place visiting our favorite spots. On a clear day, at one of the higher points, you can see the new Freedom Tower off in the distance.. though I couldn’t get a good shot of it, you can see a faint shadow right at the tip of the tree in the center of the pic below..

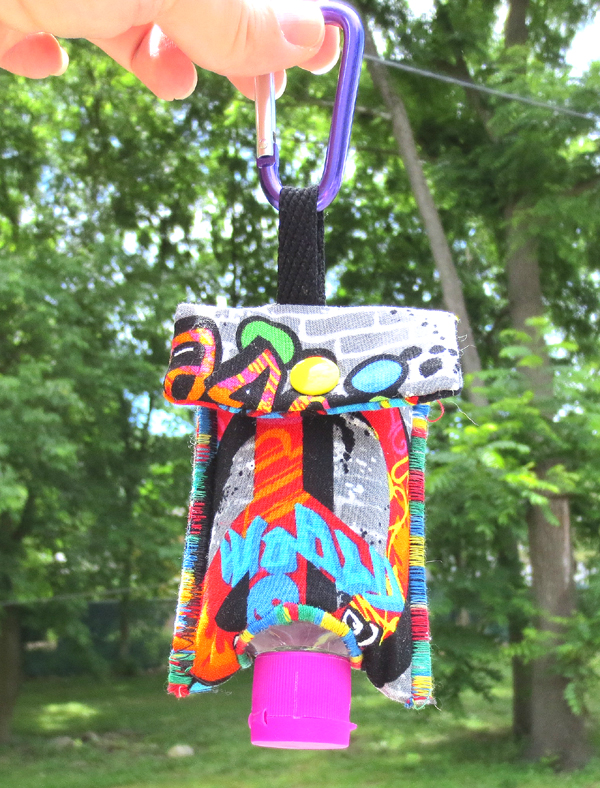
Anywho, after that adventure we were left with the need for everyone to have their hand sanitizer clipped to their pack.. if for nothing else, my own sanity! So I made a cute little cozy for the bottles that don’t already have a clip on them:

I know, it’s in a sorry state for such a useful little thing, but as I’m sure you know – useful things get USED! This one was the prototype!
Here’s the pattern: Hand Sanitizer Cozy (as usual there is no seam allowance) for personal use only please 🙂
I used a scrap of upholstery fabric, a size 20 resin snap and a piece of shoelace! My son insisted on using a carabiner clip, he said it would be more secure.. hehe. You can use whatever you like though, there is more than one way to attach this thing to a pack!
Super simple to put together, cut two pieces out of the pattern, with right sides together stitch together leaving one end open. Turn out and with a nice caterpillar stitch, go around the hole and over the open end. With right sides together again fold the hole evenly in half and stitch up the sides however you like, add your snap or some velcro, stitch on some ribbon or a shoelace securely where the flap folds over – and that’s it.
In the one pictured above I did not use a nice caterpillar stitch around the hole, I used a loose skinny zigzag which clearly is fraying. Depending on the fabric you are using, you may want to add a stabilizer in between the layers near the hole like the one pictured below.
I’d like to say I’ll do a nice step by step picture tutorial at some point – but who am I kidding! I barely had time to post this! haha
Go make one!
Happy sewing! Happy hiking! Happy schools out for summer!

That’s great! I bet you’ve made more in the last 6 months than you have in the last 6 years!