
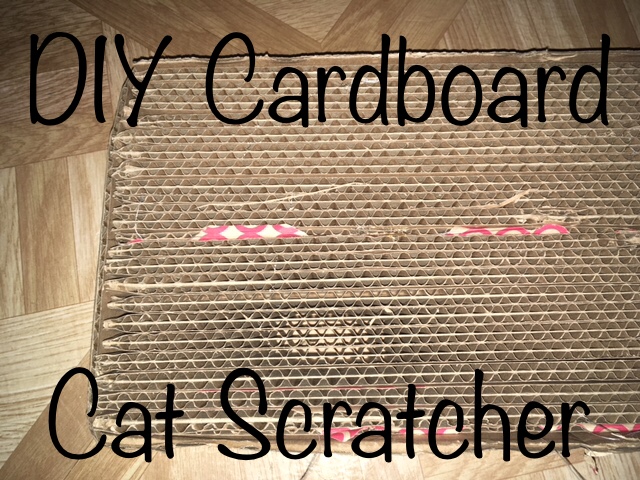
So, last week I was telling someone that I make new cat scratchers out of my big Chewy and Target boxes.. and they were looking at me like I was nutso. Then, this morning when I saw the state of my cats current scratcher (which was store bought) I thought, huh, maybe I’ll take some pictures while I make a new one and post them on that dusty old blog of mine.
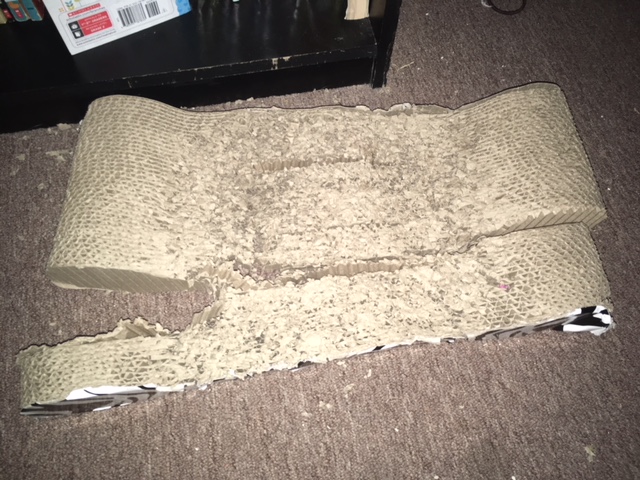
This one, which I would never buy again, is toast. I buy these things as much as I make them. They are inexpensive, useful and provide my kitties with much joy. I will only buy ones that you can flip and they must have a bottom to catch all the scratchins. These bottomless ones fall apart real fast and need a constant clean up crew.
That said, let me show you how I make them- it’s super easy.
You will need:
- 1 large cardboard box (or 2)
- an exacto knife or box cutter
- hot glue gun and a couple glue sticks
- yard stick or ruler
- pencil
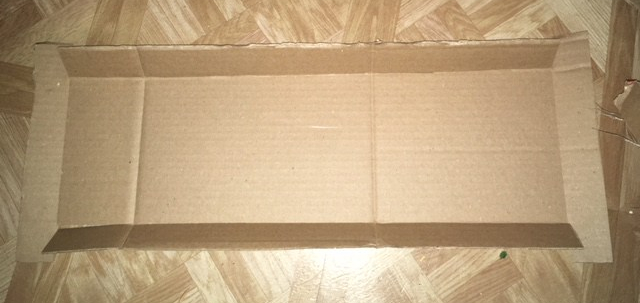
I’m using a large Target box today that is a rectangle shape. I will be using the 2 longer sides for the scratcher and one of the extra shorter sides for the box base. You may have a different shaped box or you may want to use several boxes to make a gigantic one. I’ve made big and small, my cats could care less what they look like so I’ve developed a pretty quick system of throwing them together.
You will essentially be making acordians here and you want to slice the cardboard against the grain. If you cut with the grain it will be sortof useless and ugly, trust me.
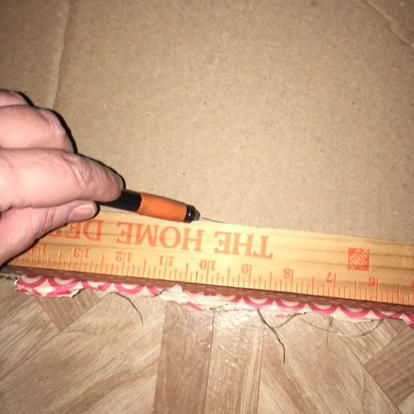
I lay the cardboard on the floor and try to put something underneath it in case I go through. You don’t want to cut all the way through anything, you just want to slice through the surface, or score it, so you can bend it and it will still be attached. I use a yard stick for measuring and slicing this entire project. You could use a regular ruler, but if you have a yard stick it will be easier.
Line your yardstick up with the bottom edge of your cardboard, hold it steady by pressing lightly with your fingertips keeping them WAY out of the way while you slice all the way down the cardboard. Like so:
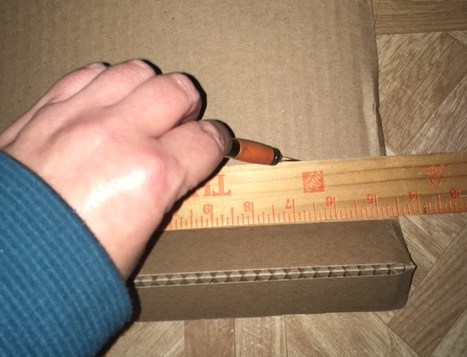
Next, flip your cardboard over, fold up the slice you just made and line up the yardstick with that fold and slice again.
**Safety Alert** If you are not familiar with using a sharp craft knife please seek help or adult supervision, nobody likes a sliced finger!
And you just keep flipping and folding and slicing until you get to the end. Then start on the next.
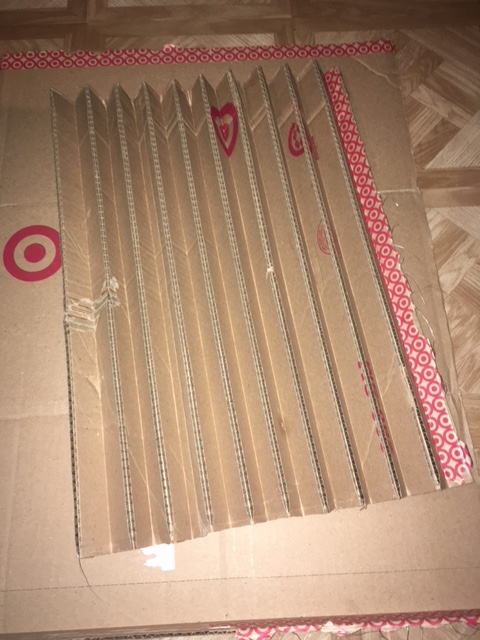
When you have all the accordians you want, you glue them together end to end.
**Safety Alert** If you are not experienced with using a hot glue gun, seek help or find an adult! Glue burns stink!


For extra strength I put a dot of glue in between each fold too, unless you fancy the suprise silly snake effect when your cat inevitably pulls up the whole shebang. Been there done that, not fun.
When you’ve got it all bunched together, squeeze it tight and lay it down on some extra cardboard to be sure you have enough to cover the bottom and all 4 sides. I measured mine and used the yardstick here to get a perfect fit, but really you can also just trace it and eyeball the measurments – the cats will not notice at all.


I lightly score all the lines and cut through one side of each corner to make little tabs.
So sorry that my kitchen floor sorta blends in with the cardboard, but hopefully you can see how I scored and folded it here.
Then you squish up your accordian to fit inside and hot glue the tabs down.

Clear as mud? Hopefully I’ve made this look as easy as it is. Your cats will thank you for your minimal effort, trust me.
I didn’t even vacuum up the mess from the old scratcher and they were on the scene!

Yup, they love it!

Go make one!

[…] this scratcher looks similar to some of the others in our blog, the creator at Threaded Alchemy used a slightly different process so we had to include it in our […]
[…] this scratcher looks similar to some of the others in our blog, the creator at Threaded Alchemy used a slightly different process so we had to include it in our […]
[…] this scratcher looks similar to some of the others in our blog, the creator at Threaded Alchemy used a slightly different process so we had to include it in our […]
[…] this scratcher looks similar to some of the others in our blog, the creator at Threaded Alchemy used a slightly different process so we had to include it in our […]
[…] this scratcher appears just like a few of the others in our weblog, the creator at Threaded Alchemy used a barely completely different course of so we needed to embody it in our […]
[…] this scratcher looks similar to some of the others in our blog, the creator at Threaded Alchemy used a slightly different process so we had to include it in our […]
[…] scratcher is similar to other ones in our blog but the creator created it. Threaded Alchemy We used a slightly different method so we had to include this in our […]
[…] this scratcher looks similar to some of the others in our blog, the creator at Threaded Alchemy used a slightly different process so we had to include it in our […]
[…] this scratcher looks similar to some of the others in our blog, the creator at Threaded Alchemy used a slightly different process so we had to include it in our […]